I've been working on the rest of the tutorials for the little sailboats and canoes and cars and planes!

If you're new to House Revivals, these are sweet little ornaments made from egg cartons!

They are original designs that I shared about in this post, and this post.


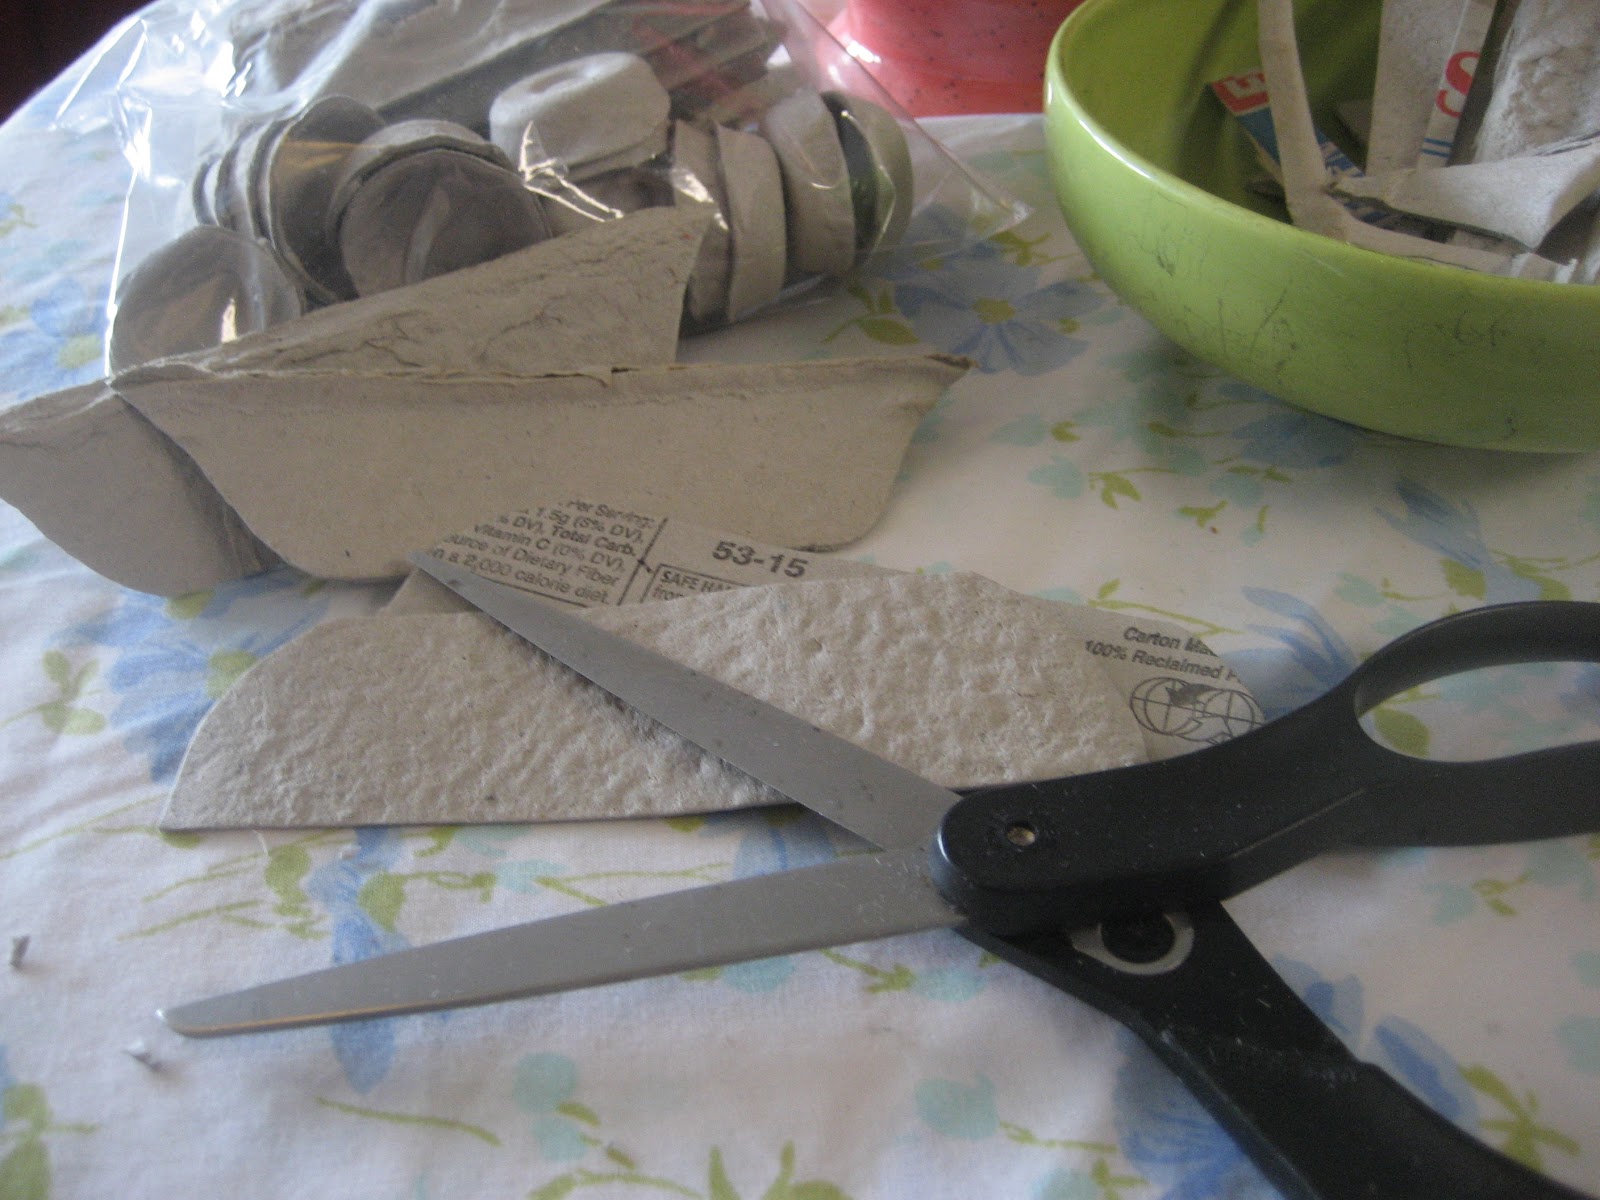
We left off at the end of the first tutorial with our egg carton cut up into pieces that would form an airplane, some cars, a couple of canoes, and some sailboats -- all that from one lowly egg carton.

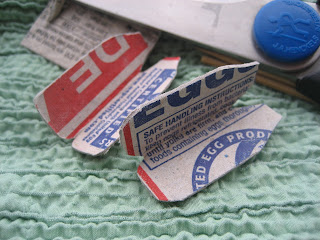
In this second installment of the tutorial, we will work on the little boats. Remember how we cut the top of the carton into these sections?

Then we "paired up" the pieces and cut boat shapes out of them.

So, we'll get out our little baggie of pieces, and pull out the boat hull sides.

See how we used the rough edge of the carton lid for the gunwales of the boats? You don't have to leave them rough like this, but it's nice vintage touch.

Start by running a thin bead of glue around the bottom edge of one of your halves. I like to use a paintable wood glue, because it works so well on cardboard, and will never come apart. It has a little longer drying time than a lot of other glues, though.

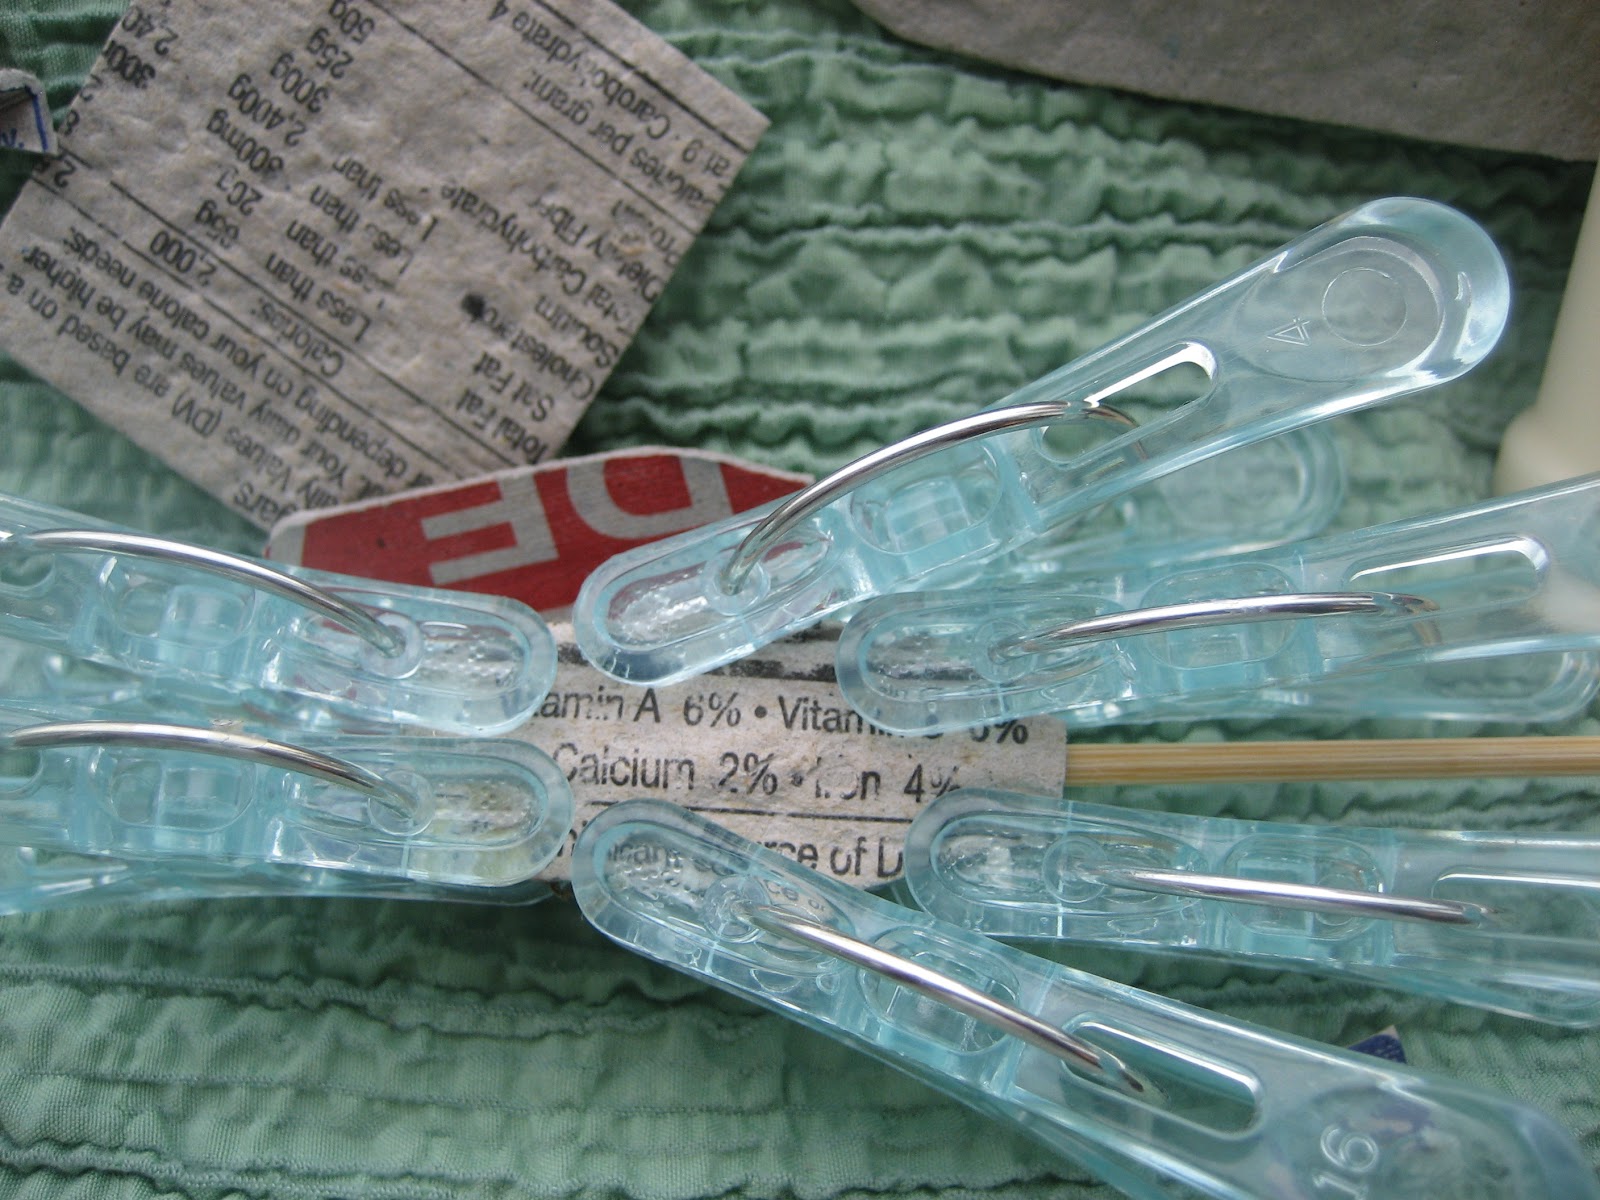
Press the side together. As you can see, the rough side faces out. The texture of the rougher side of the cardboard is reminiscent of vintage paper ornaments. Wipe off the excess glue, and clip (you could sit and hold it with your fingers until the glue dries, if you really want to). Can I just say that I do not like these plastic clips? For this project, wood clothes pins are much better -- the plastic wants to slip off when placed this close to the edge -- and you want to keep the clips on the very edge.

Once the edges are clipped, gently coax the little boat hull open.

You can put some rolled up paper towel (or whatever is handy) inside the boat to hold the sides apart. This will prevent the sides from becoming glued together if excess glue seeps up.

After the glue has dried, and the clips are removed, I like to run a bead of glue or caulk or hot glue down the seam in the middle. This is to help the boat keep its shape. I prefer to use hot glue, as it hardens so quickly. Here, I used wood glue, which took way too long to dry....

Now, we can start on some canoe paddles. Remember how we had an extra "spare parts" piece of cardboard? Cut a couple of pieces from it about 1 3/4 inches square. Fold the first square in half and cut into a paddle shape. Cut the second square so it is identical to the first.

Now, glue a short skewer (or paper lollipop stick, or whatever) to the "paddle" and glue, as shown.

Clip. Yes, six clips is probably excessive, but I'm obsessive...

After all your paint dries, line up your little boats and paddles and admire how cute they are. You could leave the boats like this (they would look wonderful left unpainted, but slightly gilded), or you could paint them.

I painted mine in pretty, "beachy" colors....
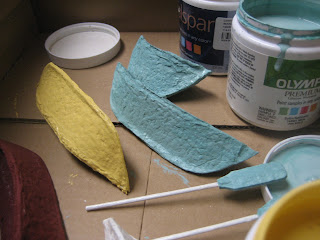
Even the canoe paddles got some paint. While you're at it, you might want to paint some skewers to use as sailboat masts.

After the paint dries comes the fun part.

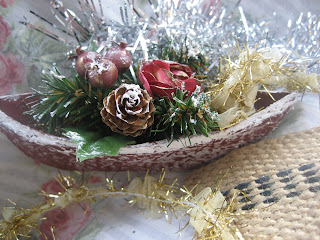
Gather up bit and pieces of greenery, tiny gifts, Santa sacks, ribbons, tinsel -- anything you want, depending on how you want your finished ornaments to "feel".

Play around with ways to decorate your boats. You could even leave them plain. Or skip all the decorations, and give them a good coating of German glass glitter!

Here, I'm just playing around with ideas -- no glue yet. Just tossing around ideas -- before any glue or glitter or snow goes on, this will all be tweaked and edited!

If I'm making dozens of these guys, I usually come up with a "formula" to create the feel I'm going for that year, and just "assembly line" it.

So, the first one takes about two days of toying around, walking away from it, coming back and staring at it..., and then they each take about two minutes to put together after that!

If you are making a sail boat, you will need a mast and a sail. Here, I just used a skewer and some off-white fabric that I stiffened with diluted white glue.

I used gesso one year, and was able to punch little holes in the sail to run "rigging" through... so cute! This time, we just glued the sails to the mast and added glitter. You could use anything that struck your fancy for the mast. How about a stick, with faded striped ticking for the sail?

I think I like the idea of an all white sailboat -- maybe the hull should be antiqued a little, and a vintage banner or flag created?

Now, play around some more.

If the ornament is being given as a gift, try customizing it to match the recipient's decor. Hmmm, this needs something.... I'll think on it a bit... maybe something more like this?
 How about adding a bit of snow?
Have fun with it!

Maybe add a pop of apple green...?

Or not?

Yes?

No?

I'll let you decide. Tell me what you think in a comment! The tutorials for the little airplane and the car are coming up, so be sure to click "follow" in my side bar, so you'll be sure not to miss them.

*if you are doing this as a children's craft project, please simplify it, so that everybody has fun!

If you're new to House Revivals, these are sweet little ornaments made from egg cartons!

They are original designs that I shared about in this post, and this post.


We left off at the end of the first tutorial with our egg carton cut up into pieces that would form an airplane, some cars, a couple of canoes, and some sailboats -- all that from one lowly egg carton.

In this second installment of the tutorial, we will work on the little boats. Remember how we cut the top of the carton into these sections?

Then we "paired up" the pieces and cut boat shapes out of them.
So, we'll get out our little baggie of pieces, and pull out the boat hull sides.

See how we used the rough edge of the carton lid for the gunwales of the boats? You don't have to leave them rough like this, but it's nice vintage touch.

Start by running a thin bead of glue around the bottom edge of one of your halves. I like to use a paintable wood glue, because it works so well on cardboard, and will never come apart. It has a little longer drying time than a lot of other glues, though.

Press the side together. As you can see, the rough side faces out. The texture of the rougher side of the cardboard is reminiscent of vintage paper ornaments. Wipe off the excess glue, and clip (you could sit and hold it with your fingers until the glue dries, if you really want to). Can I just say that I do not like these plastic clips? For this project, wood clothes pins are much better -- the plastic wants to slip off when placed this close to the edge -- and you want to keep the clips on the very edge.

Once the edges are clipped, gently coax the little boat hull open.

You can put some rolled up paper towel (or whatever is handy) inside the boat to hold the sides apart. This will prevent the sides from becoming glued together if excess glue seeps up.

After the glue has dried, and the clips are removed, I like to run a bead of glue or caulk or hot glue down the seam in the middle. This is to help the boat keep its shape. I prefer to use hot glue, as it hardens so quickly. Here, I used wood glue, which took way too long to dry....

Now, we can start on some canoe paddles. Remember how we had an extra "spare parts" piece of cardboard? Cut a couple of pieces from it about 1 3/4 inches square. Fold the first square in half and cut into a paddle shape. Cut the second square so it is identical to the first.


Now, glue a short skewer (or paper lollipop stick, or whatever) to the "paddle" and glue, as shown.

Clip. Yes, six clips is probably excessive, but I'm obsessive...
After all your paint dries, line up your little boats and paddles and admire how cute they are. You could leave the boats like this (they would look wonderful left unpainted, but slightly gilded), or you could paint them.

I painted mine in pretty, "beachy" colors....

Even the canoe paddles got some paint. While you're at it, you might want to paint some skewers to use as sailboat masts.

After the paint dries comes the fun part.

Gather up bit and pieces of greenery, tiny gifts, Santa sacks, ribbons, tinsel -- anything you want, depending on how you want your finished ornaments to "feel".

Play around with ways to decorate your boats. You could even leave them plain. Or skip all the decorations, and give them a good coating of German glass glitter!

Here, I'm just playing around with ideas -- no glue yet. Just tossing around ideas -- before any glue or glitter or snow goes on, this will all be tweaked and edited!

If I'm making dozens of these guys, I usually come up with a "formula" to create the feel I'm going for that year, and just "assembly line" it.

So, the first one takes about two days of toying around, walking away from it, coming back and staring at it..., and then they each take about two minutes to put together after that!

If you are making a sail boat, you will need a mast and a sail. Here, I just used a skewer and some off-white fabric that I stiffened with diluted white glue.

I used gesso one year, and was able to punch little holes in the sail to run "rigging" through... so cute! This time, we just glued the sails to the mast and added glitter. You could use anything that struck your fancy for the mast. How about a stick, with faded striped ticking for the sail?

I think I like the idea of an all white sailboat -- maybe the hull should be antiqued a little, and a vintage banner or flag created?

Now, play around some more.

If the ornament is being given as a gift, try customizing it to match the recipient's decor. Hmmm, this needs something.... I'll think on it a bit... maybe something more like this?


Have fun with it!

Maybe add a pop of apple green...?

Or not?

Yes?

No?

I'll let you decide. Tell me what you think in a comment! The tutorials for the little airplane and the car are coming up, so be sure to click "follow" in my side bar, so you'll be sure not to miss them.
Happy Crafting!
*if you are doing this as a children's craft project, please simplify it, so that everybody has fun!
** for part one of this tutorial series, click here
*** these little ornaments are not just for Christmas -- customize them to your holiday or special occasion. You could even do a Mayflower version, and use as place card holders at Thanksgiving!
This post is being linked to: